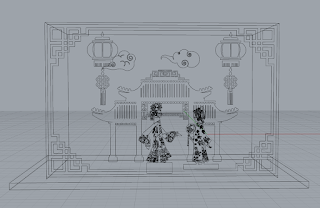
Shadow Play Light box
Shadow Play Lightbox
In this week of assignment project we tested printing the object I traced in Rhino in a 3D printer. After two hours of hard work, Professor Greg Ball helped me to find the right setting for printing it.
In this printing process, there are a couple of steps to remember for next time:
1. The object outline must be joined. This will ensure a faster printing process. To join the carves in Rhino select the carves and click the join icon .
.
2. The object must be checked if there is a duplicate curve.
To check duplicate lines: go to Edit - Select Objects - Duplicate Objects.
3. Make sure the cutting line is colored in red: To do so, change the layer you want to cut in red.
4. When cutting in the 3D printing machine setting is "Paper" "Artboard" and "Hairline."
I recorded a video of printing the object, and it was pretty cool.
The first attempt was around 6.7in tall; the final object came out slightly burned, and some details were unclear.
(First attempt 6.7")
(Second attempt around 8")
This is the draft for the final product. It will contain more detail in the background and different layers.
The final project will install a LED light.
References:
<a href="https://www.freepik.com/free-vector/oriental-frames-set_8610267.htm#query=Chinese%20pattern&position=3&from_view=search&track=sph">Image by pch.vector</a> on Freepik
https://www.freepik.com/free-vector/asian-decorative-elements-set_9649017.htm#query=Chinese%20pattern&position=2&from_view=search&track=sph


Comments
Post a Comment